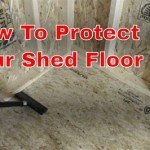
How to Seal Chipboard Flooring on a Concrete Floor
Chipboard flooring, also known as particleboard flooring, offers an affordable and versatile option for covering concrete floors. However, chipboard is porous and susceptible to moisture damage. To protect your investment and ensure the longevity of your flooring, sealing it is crucial. This article will guide you through the process of effectively sealing chipboard flooring on a concrete floor.
Prepare the Concrete Subfloor
The success of sealing chipboard flooring depends on a well-prepared concrete subfloor. Moisture rising from the concrete can damage the chipboard, leading to warping, buckling, and mold growth. Before installing the chipboard, ensure the concrete is clean, dry, and level.
1.
Clean the Concrete:
Use a stiff-bristled broom to sweep away any debris, dirt, or loose particles. You can also use a shop vacuum for a more thorough cleaning. If the concrete is heavily soiled, consider using a concrete cleaner diluted with water according to the manufacturer's instructions. Allow the floor to dry completely before proceeding.2.
Address Moisture Issues:
If the concrete subfloor is damp or shows signs of moisture, it's essential to address the issue before laying chipboard. Consider using a moisture barrier, such as a 6-mil polyethylene sheet, or sealing the subfloor with a moisture-resistant primer. Consulting with a professional is recommended to determine the best approach for your specific situation.3.
Level the Concrete:
Any imperfections or unevenness in the concrete can cause the chipboard to warp or become unstable. If necessary, use a self-leveling compound to create a smooth and even surface for the flooring.Apply a Moisture Barrier
A moisture barrier acts as a protective layer between the concrete subfloor and the chipboard flooring. It prevents moisture from migrating up from the concrete, minimizing the risk of damage to the chipboard. There are several options for moisture barriers, each with its advantages and disadvantages.
1.
Polyethylene Sheet:
This is the most common and cost-effective option. It's available in various thicknesses, typically 6 mil or thicker. Place the sheet over the concrete subfloor, overlapping the seams by at least 6 inches. Secure it in place with tape or tack strips.2.
Vapor Barrier Paint:
This type of paint creates a waterproof layer on the concrete surface. It's typically applied in two coats and provides a durable moisture barrier. However, it can be more expensive than a polyethylene sheet.3.
Moisture-Resistant Underlayment:
This can be used as an alternative approach. It’s typically made from foam or other materials that offer both moisture resistance and cushioning properties. If you choose this option, ensure it is specifically designed for concrete floors and adheres to the manufacturer's installation guidelines.Seal the Chipboard
Once the moisture barrier is in place, you can apply a sealer to the chipboard flooring. This helps protect the surface from moisture, dirt, and spills. The type of sealer you choose will depend on the specific application and desired finish.
1.
Polyurethane Sealant:
This is a popular option for sealing chipboard flooring. It's durable, water-resistant, and offers a clear finish that enhances the natural look of the wood. You can choose between gloss, satin, or matte finishes based on your preference.2.
Acrylic Sealant:
Acrylic sealants are water-based and offer good moisture protection with a less-durable finish. They are typically easier to work with and clean up compared to polyurethane sealants.3.
Oil-Based Sealant:
These sealants are more difficult to work with but provide a very durable finish. Choose oil-based sealants if you need a high level of moisture resistance.Before applying the sealant, ensure that the chipboard is clean and dry. Follow the manufacturer's instructions carefully regarding drying times and application techniques. Multiple thin coats are generally better than one thick coat for optimal results.
Additional Tips
1.
Ventilation:
Good ventilation is essential for drying the sealant and preventing moisture buildup. Open windows or use fans to circulate the air during and after the sealing process.2.
Maintenance:
After sealing, regular cleaning and maintenance will help preserve the longevity of your chipboard flooring. Sweep or vacuum regularly to remove dirt and debris. Avoid using harsh chemicals or abrasive cleaners that can damage the sealant.3.
Re-Sealing:
Depending on the type of sealant and the amount of wear and tear, you may need to re-seal the floor every few years to maintain its protection.By following these steps, you can effectively seal chipboard flooring on a concrete floor, protecting it from moisture and enhancing its durability.

Insulating A Concrete Slab Diy Garage Conversion Floating Floor

Preparing A Chipboard Floor For Painting Property Home Survive France

How To Lay Chipboard Flooring Roofing Super Help Advice

Floor Coating Over Plywood Subfloor Amazing Result

Preparing A Chipboard Floor For Painting Property Home Survive France

Hd1022 Cem28 Mf Chipboard Flooring System

Concrete Over Plywood Upgrade Wood Subfloor Into

Paper Bag Floors A Step By Tutorial Wildfire Interiors

Hd1017 Floating Floor Sound Insulation System

Paper Bag Floors A Step By Tutorial Wildfire Interiors
See Also

