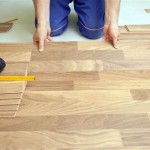
How To Strip Paint From Hardwood Floors
Removing paint from hardwood floors can seem daunting, but with the right tools, techniques, and safety precautions, it can be a manageable DIY project. This process reveals the natural beauty of the wood and prepares the surface for refinishing. Understanding the type of paint and the condition of the floor is crucial for choosing the most effective and safest removal method.
1. Assessing the Paint and Floor
Before starting, identify the type of paint on the floor. Oil-based paints require different removal methods than water-based paints. Knowing the paint type will help determine the appropriate stripper and safety precautions. Examine the floor's condition for any existing damage, such as deep scratches or warping. This assessment will inform the stripping process and subsequent refinishing steps.
Testing a small, inconspicuous area is recommended. This test patch allows one to gauge the stripper's effectiveness and the floor's reaction to the chemicals. It also helps determine the number of applications required for complete paint removal.
2. Gathering Necessary Materials and Safety Gear
Proper safety equipment is essential when working with chemical strippers. This includes wearing chemical-resistant gloves, safety goggles, and a respirator or mask to prevent inhalation of fumes. The workspace should be well-ventilated throughout the entire process. Having a fire extinguisher readily available is also a crucial safety precaution.
Assemble the necessary tools, including a paint scraper, putty knife, stiff-bristled brush, steel wool, drop cloths, plastic sheeting, and rags. Select a paint stripper suitable for the type of paint identified in the assessment phase. Consider environmentally friendly options if available and appropriate for the project.
Having a container for waste disposal is essential. This container should be specifically designated for the used stripper and other waste materials generated during the process. Proper disposal according to local regulations is crucial for environmental safety.
3. Applying the Paint Stripper
Following the manufacturer's instructions, apply the paint stripper evenly to the floor's surface. A thick, even coat ensures maximum effectiveness. Avoid applying the stripper over too large an area at once, as it may dry before it can effectively penetrate the paint. Work in manageable sections for optimal results.
Allow the stripper to dwell on the surface for the recommended time, typically indicated on the product's packaging. This dwell time allows the stripper to soften and lift the paint. Avoid leaving the stripper on the floor for longer than the recommended time, as it can damage the wood.
4. Removing the Stripped Paint
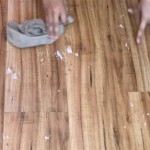
Once the paint has softened, carefully remove it using a paint scraper or putty knife. Hold the scraper at a low angle to prevent gouging the wood. Work in the direction of the wood grain for a cleaner removal. For stubborn areas, a stiff-bristled brush or steel wool can be helpful.
After removing the bulk of the paint, use mineral spirits or a recommended cleaning solution to neutralize the stripper residue. This step is essential for proper adhesion of any subsequent finishes. Thoroughly wipe the surface clean with rags and allow it to dry completely.
5. Neutralizing and Cleaning
Neutralizing the stripper is critical for preventing it from interfering with future finishes. Using the appropriate neutralizing agent recommended by the stripper manufacturer will ensure the wood is properly prepared for the next steps. Following the manufacturer's instructions for neutralization is crucial for achieving optimal results.
After neutralizing the stripper, clean the floor thoroughly to remove any remaining residue. This can be achieved using a suitable cleaning solution and rags. Allow the floor to dry completely before proceeding with any further steps, such as sanding or refinishing.
6. Final Preparation and Considerations
Once the floor is dry, light sanding may be necessary to smooth the surface and prepare it for refinishing. This step ensures a uniform and level surface for the new finish. Careful sanding can also address any minor imperfections revealed during the stripping process.
Dispose of all waste materials, including used stripper, rags, and other debris, according to local regulations. This step is crucial for environmental responsibility and safety. Consult local guidelines for proper disposal methods.
If unsure about any step in the process, consulting a professional floor refinisher is recommended. They can offer expert advice and ensure the process is carried out correctly, preserving the integrity of the hardwood floors.

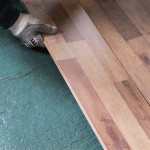
Don S Room Progress How To Remove Paint From Wood Floors At Home With Ashley

How To Remove Old Paint From A Wooden Floor Esb Flooring

Don S Room Progress How To Remove Paint From Wood Floors At Home With Ashley

Easily Remove Paint From Your Floors

Don S Room Progress How To Remove Paint From Wood Floors At Home With Ashley

How To Remove Paint Off Hardwood Floors Safely

Using Paint Stripper On Painted Wood Floors Removing A Couple Layers Of Old Latex Floor

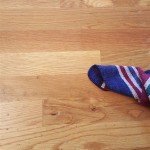
Easiest Ways To Clean Paint Stains From Your Hardwood Floors

How To Remove Paint From Hard Wood Floors

Removing Paint From Wood Flooring And Beyond Blog
See Also