How to Waterproof Bathroom Plywood Subfloor
Protecting your bathroom subfloor from moisture damage is crucial to ensure the longevity and integrity of your bathroom. Waterproofing the plywood subfloor can prevent water from seeping through, causing rot, mold, and structural issues. This comprehensive guide will provide step-by-step instructions on how to waterproof a bathroom plywood subfloor effectively.
Materials You'll Need:
- Plywood subfloor
- Waterproof membrane (e.g., polyethylene sheeting, tar paper, or roofing felt)
- Self-adhesive tape
- Caulk
- Flooring adhesive
- Corner beads (optional)
Step 1: Prepare the Subfloor
Ensure that the plywood subfloor is clean, flat, and dry. Remove any debris or loose nails. Sand any rough edges or uneven surfaces to create a smooth base for the waterproof membrane.
Step 2: Install the Waterproof Membrane
Roll out the waterproof membrane over the subfloor, ensuring it covers the entire surface, including any edges and corners. Overlap the membrane at least 6 inches at all seams and secure it using self-adhesive tape.
Step 3: Seal the Joints
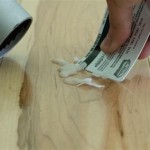
Apply a bead of caulk along all seams and joints where the waterproof membrane overlaps. Use a wet finger or a caulk tool to smooth the caulk and create a watertight seal.
Step 4: Install the Corner Beads (Optional)
Corner beads help protect the corners of the subfloor from moisture damage. Install corner beads at all inside and outside corners using flooring adhesive. Seal any gaps between the corner beads and the subfloor with caulk.
Step 5: Secure the Waterproof Membrane
Once the corner beads are installed, apply flooring adhesive around the perimeter of the room and in any areas where the waterproof membrane overlaps. Use a notched trowel to spread the adhesive evenly, then press the waterproof membrane firmly into place.
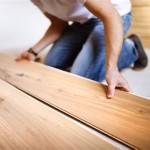
Step 6: Apply the Flooring
Follow the manufacturer's instructions to install your chosen flooring over the waterproofed subfloor. Ensure to stagger the joints between the flooring panels and use appropriate adhesive for the type of flooring you are using.
Tips for Success:
- Use high-quality waterproof membrane materials.
- Overlap the membrane generously and seal all seams thoroughly.
- Allow the flooring adhesive to dry completely before using the bathroom.
- Inspect the waterproof membrane regularly for any tears or damage.
By following these steps and tips, you can effectively waterproof your bathroom plywood subfloor and prevent moisture damage that can compromise the structural integrity and longevity of your bathroom.

Bathroom Subfloor Features Benefits Cost And Types

How To Waterproof A Bathroom Floor Using Schluter Ditra Underlayment Over Wood Subfloor

How To Waterproof A Bathroom Floor Using Schluter Ditra Underlayment Over Wood Subfloor

How To Waterproof Bathroom Floors Hydro Ban Method By Home Repair Tutor

Condo Blues How To Prep A Wood Subfloor For New Tile

Tiling On Wooden Floors Part 4 Overboarding Bathroom Guru

Bathroom Floor Waterproofing Options And Repairs Ceramic Tile Advice Forums John Bridge

Bathroom Floor Waterproofing Options And Repairs Ceramic Tile Advice Forums John Bridge

Tiling A Walk In Shower Chapter 1 Making The Mud Base Jlc

Shower Pan Subfloor Created With 3 4 Flooring Plywood Building A Remodel Small
See Also