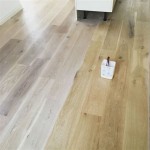
Whitewashing Oak Floors: A Comprehensive Guide
Transforming oak floors with a classic whitewashed finish is a timeless and versatile home improvement project that can enhance any living space. This guide will provide a step-by-step approach to help you achieve the perfect whitewashed look for your oak floors.
Materials Required:
- Whitewash solution (pre-mixed or DIY)
- Clean rags or paintbrushes
- Sandpaper (120-grit and 220-grit)
- Vacuum cleaner
- Polyurethane finish (optional)
Step 1: Sanding the Floor
Begin by sanding the oak floor to remove any existing finish or unevenness. Start with 120-grit sandpaper to remove the top layer, then switch to 220-grit sandpaper for finer sanding. Vacuum thoroughly to remove any sanding dust.
Step 2: Preparing the Whitewash Solution
If using a pre-mixed whitewash solution, follow the manufacturer's instructions for application. If making your own whitewash, combine water-based latex paint (in your desired white shade) with water in a 1:1 ratio.
Step 3: Applying the Whitewash
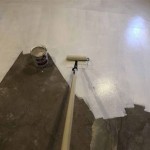
Apply the whitewash evenly over the floor using a clean rag or paintbrush. Work in small sections to ensure uniform coverage. Allow the first coat to dry completely (approximately 2-4 hours).
Step 4: Sanding and Reapplying Whitewash
Once the first coat is dry, lightly sand the floor again with 220-grit sandpaper to remove any raised grain. Vacuum to remove sanding dust and apply a second coat of whitewash. This process can be repeated for additional layers to achieve the desired level of whiteness.
Step 5: Finishing the Floor (Optional)
For increased durability and protection, consider applying a polyurethane finish to the whitewashed floor. Choose a clear or matte finish to maintain the whitewashed appearance. Apply two to three thin coats, allowing each coat to dry completely before applying the next.
Tips for a Successful Finish:
- Use a high-quality whitewash solution or paint.
- Apply thin, even coats of whitewash.
- Allow each coat to dry completely before sanding or applying another layer.
- Consider adding a polyurethane finish for added protection.
- Test the whitewash on an inconspicuous area first to ensure desired results.
Conclusion:
Whitewashing oak floors is a rewarding project that can revitalize your living space with a timeless and elegant look. By following the steps outlined in this guide, you can achieve stunning whitewashed floors that enhance the beauty and character of your home.

Wood Floor Refinishing And Whitewashing The Honeycomb Home

Diy Whitewashed Wood Floors Renovation Semi Pros

Sanding And Whitewashing Wood Floors

York White Washed Solid Hardwood Oak Flooring

Diy Whitewashed Wood Floors Renovation Semi Pros

How To White Wash Lime Wood Flooring Oak Timber

Studio Hardwood Flooring Stained Or Whitewashed Addicted 2 Decorating

How To Whitewash Hardwood Floors The Right Way Flooring Girl

Nostalgiecat How To Whitewash Wooden Flooring

How To White Wash Lime Wood Flooring Oak Timber
See Also
