How to Whitewash Wood Floors: A Step-by-Step Guide to Refresh Your Home
Whitewashing wood floors is a popular technique to create a rustic and charming look in your home. It involves applying a mixture of paint and water to the floor, creating a subtle and weathered effect that adds character and depth to the space. Whether you're looking to update an old floor or add a touch of coastal charm to your home, whitewashing can be a simple and effective solution.
Materials You'll Need:
- White paint
- Water
- Bucket or large container
- Stirring stick
- Paint brush or roller
- Sandpaper or sanding block
- Tack cloth
- Polyurethane finish (optional)
Step 1: Prepare the Floor
Begin by thoroughly cleaning the floor to remove any dirt or debris. If the floor has any existing finish, sand it lightly with medium-grit sandpaper to remove the top layer and create a smooth surface for the whitewash. Wipe the sanded floor with a tack cloth to remove any dust.
Step 2: Create the Whitewash Mixture
In a bucket or large container, mix one part white paint with three parts water. The ratio can be adjusted based on the desired opacity of the whitewash. For a more opaque finish, use less water. For a more subtle effect, add more water.
Step 3: Apply the Whitewash
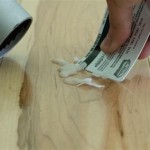
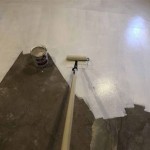
Using a paint brush or roller, apply a thin layer of the whitewash mixture to the floor. Work in sections to avoid the whitewash drying too quickly. As you apply the whitewash, pay attention to the grain of the wood and brush or roll in the direction of the grain.
Step 4: Let the Whitewash Dry
Allow the whitewash to dry completely, which may take several hours or overnight. Once dry, inspect the floor for any areas that need touch-ups or additional coats. If necessary, apply another layer of whitewash until you achieve the desired effect.
Step 5: Distress the Floor (Optional)
For a more distressed or rustic look, you can use sandpaper to lightly sand the floor after the whitewash has dried. Focus on the edges and corners of the planks to create a worn and weathered appearance.
Step 6: Seal the Floor (Optional)
To protect the whitewashed floor and make it more durable, you can apply a polyurethane finish. Use a clear polyurethane finish to preserve the natural color and texture of the whitewashed wood. Allow the polyurethane to dry completely before walking on the floor.
Tips:
- Test the whitewash mixture on an inconspicuous area before applying it to the entire floor to ensure the desired opacity and effect.
- Use a high-quality white paint specifically designed for floors for best results.
- Apply thin layers of whitewash and allow each layer to dry completely before applying the next.
- If you're not sure how much whitewash to apply, err on the side of less and add more if needed.
- Whitewashing can be a messy process, so cover surrounding areas and wear protective gear.

Wood Floor Refinishing And Whitewashing The Honeycomb Home

Sanding And Whitewashing Wood Floors

Diy Whitewashed Wood Floors Renovation Semi Pros

Diy Whitewashed Wood Floors Renovation Semi Pros

Nostalgiecat How To Whitewash Wooden Flooring

Diy Whitewashed Wood Floors Renovation Semi Pros

Whitewash Hardwood Floors Wood Flooring La

How To Whitewash Hardwood Floors The Right Way Flooring Girl
:strip_icc()/10194750920whitewash20floors20step202-99eae86a2dd746d9b89b35a639a0973a.jpg?strip=all)
How To Whitewash Hardwood Flooring For A Fresher Aesthetic

How To White Wash Lime Wood Flooring Oak Timber
See Also
