How to Whitewash Wooden Floors: A Step-by-Step Guide
Whitewashing wooden floors is a popular technique to create a charming and rustic look in a home. The process involves applying a thin layer of paint to the surface of the wood, which helps to highlight the grain and texture while maintaining the natural beauty of the material.
Whether you're considering whitewashing your wooden floors for the first time or looking to refresh an existing finish, this step-by-step guide will provide you with all the essential information you need. We'll cover everything from preparing your floors to selecting the right paint and applying it with precision, ensuring you achieve a stunning end result.
Step 1: Prepare Your Floors
Before you start whitewashing, it's crucial to prepare your floors properly. Begin by sweeping and vacuuming to remove any dirt or debris. If your floors have been waxed or oiled in the past, you'll need to remove the finish using a chemical stripper. Once the floors are clean and free of any previous finishes, lightly sand them to create a smoother surface for the paint to adhere to.
Step 2: Choose the Right Paint
Selecting the appropriate paint for whitewashing is essential. Opt for a water-based acrylic paint that is specifically designed for use on floors. This type of paint is durable, easy to apply, and dries quickly. For a true whitewash effect, choose a paint with a high opacity and low sheen. Flat or matte finishes will give you the most natural and rustic look.
Step 3: Apply the Paint
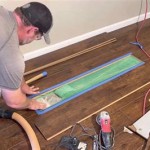
The application process for whitewashing is relatively straightforward. Start by pouring some paint into a paint tray. Use a brush or a roller to apply a thin, even layer of paint to the floor, working in small sections at a time. Allow the first coat to dry completely before applying a second or third coat as needed. The number of coats you apply will depend on the desired opacity and the natural color of your floors.
Step 4: Seal the Finish
Once the whitewash has dried, it's essential to seal it with a clear polyurethane finish. This step will protect your floors from wear and tear, ensuring a long-lasting and durable finish. Apply two to three coats of polyurethane, allowing each coat to dry completely before applying the next. Use a foam brush or a roller for even application and a smooth finish.
Additional Tips
- Test the paint color on an inconspicuous area of the floor before applying it to the entire surface.
- Use a tack cloth to remove any dust or debris before applying each coat of paint or polyurethane.
- Allow ample drying time between each coat of paint and polyurethane to ensure proper adhesion and durability.
- Protect newly finished floors from foot traffic and heavy objects for at least 24 hours.
- Maintain your whitewashed floors by cleaning them regularly with a mild, pH-neutral cleaner.

Wood Floor Refinishing And Whitewashing The Honeycomb Home

Diy Whitewashed Wood Floors Renovation Semi Pros

Nostalgiecat How To Whitewash Wooden Flooring

Diy Whitewashed Wood Floors Renovation Semi Pros

Sanding And Whitewashing Wood Floors

Diy Whitewashed Wood Floors Renovation Semi Pros

How To Whitewash Wood In 3 Simple Ways A Piece Of Rainbow

How To White Wash Lime Wood Flooring Oak Timber

How To Get The Perfect White Wash Effect On Your Wooden Floor Art Of Clean 01223 863632

How To White Wash Lime Wood Flooring Oak Timber
See Also


