Installing Bruce Hardwood Flooring for Maximum Durability
Bruce hardwood flooring has been a trusted choice for homeowners for decades. Known for its durability and beauty, this type of flooring can last for years with proper installation and maintenance. To ensure maximum durability, it's essential to follow these installation guidelines carefully.
1. Subfloor Preparation
A stable and level subfloor is crucial for a long-lasting hardwood floor. Ensure the subfloor is free of any irregularities, slopes, or moisture. If needed, use concrete leveling compound to smooth the surface and eliminate any low spots.
2. Moisture Control
Hardwood is susceptible to moisture damage. Install a vapor barrier under the subfloor to prevent moisture from rising into the flooring. Use a moisture meter to measure the moisture content of the subfloor before installation and ensure it's within the specified range for the particular Bruce hardwood flooring product.
3. Expansion Gap
As hardwood expands and contracts with changes in temperature and humidity, it's essential to leave an expansion gap around the perimeter of the room. Use spacers around the walls and other obstructions to allow for this movement.
4. Underlayment
An underlayment provides added cushioning and protects the hardwood from wear and tear. Choose an underlayment that is compatible with the specific Bruce hardwood flooring product you're using. Follow the manufacturer's instructions for installation.
5. Flooring Installation
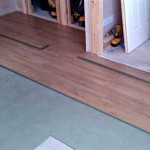
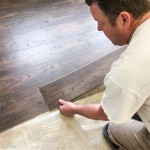
Bruce hardwood flooring typically uses a tongue-and-groove system for installation. Start by laying down the first row of planks along a straight wall, ensuring they are aligned and level. Use a tapping block and hammer to securely lock the planks together. Continue laying subsequent rows, staggering the joints for added strength.
6. Secure Flooring
Once the flooring is laid, it's essential to secure it to the subfloor. This can be done using nails, staples, or approved adhesives. Follow the manufacturer's instructions for the specific fastening method recommended for your Bruce hardwood flooring product.
7. Trim and Finish
After installation, install baseboards or moldings to cover the expansion gap and give the room a finished look. Use wood filler or matching stains to conceal any nail or staple holes for a seamless appearance.
By following these essential installation guidelines, you can ensure the maximum durability of your Bruce hardwood flooring. With proper care and maintenance, this beautiful and durable flooring will enhance the value of your home for years to come.

Bruce Floating Hardwood Review

Bruce Floating Hardwood Review

Bruce Hardwood Flooring Reviews And Cost 2024

Bruce Hardwood Flooring Solid Engineered Wood Floors Floor Boards

Bruce American Originals Natural Red Oak 3 4in T X 2 1 4 In W Varying L Solid Hardwood Flooring 20 Sq Ft Case Shd2210 The Home

Bruce America S Best Choice Haven Point White Oak 7 In W X 3 8 T Varying Length Smooth Traditional Engineered Hardwood Flooring 32 63 Sq Ft The Department At Com

Bruce Plano Marshy Wilds Hickory 3 4 In T X 5 W Solid Hardwood Flooring 23 Sq Ft Carton Sh5pl140s The Home

Bruce 3 4 In Red Oak Solid Hardwood Flooring 2 25 Wide Ll

Bruce Sample America S Best Choice Country Natural Hickory 3 4 In Solid Smooth Traditional Hardwood Flooring The Samples Department At Com

Bruce Manchester Oak 2 1 4 Solid Hardwood Woodwudy Whole Flooring
See Also
