Installing Cork Flooring: A Step-by-Step Guide
Cork flooring has gained immense popularity in recent years due to its unique combination of aesthetic appeal, durability, and environmental friendliness. It offers a warm, natural look and feel, excellent sound and thermal insulation, and a comfortable, cushioned surface. Installing cork flooring is a relatively straightforward process that can be undertaken by homeowners with basic DIY skills. This comprehensive guide provides a step-by-step explanation of the installation process, ensuring a successful project.
Preparing the Subfloor
A solid and level subfloor is crucial for a successful cork flooring installation. The subfloor must be clean, dry, and free from any debris, cracks, or unevenness. Here's a breakdown of the preparation steps:
- Remove Existing Flooring: Begin by removing any existing flooring, such as carpet, tile, or wood. Ensure that all nails or staples are removed to prevent damage to the new cork flooring.
- Clean and Level the Subfloor: Thoroughly clean the subfloor, removing dust, dirt, and debris. For uneven areas, consider using a self-leveling compound to create a smooth, flat surface.
- Check for Moisture: Cork flooring is susceptible to moisture damage. Use a moisture meter to check the subfloor's moisture content and ensure it meets the manufacturer's specifications. If the moisture level is too high, take steps like drying the subfloor or using a moisture barrier before proceeding.
- Install a Moisture Barrier: If necessary, install a moisture barrier to prevent moisture from rising from the subfloor and damaging the cork flooring. Commonly used materials include polyethylene sheeting or a specially designed moisture barrier.
- Attach a Subfloor Underlayment: Installing an underlayment beneath the cork flooring provides additional cushioning, sound insulation, and stability. Select an underlayment that is recommended for cork flooring and install it according to the manufacturer's instructions.
Installing the Cork Flooring
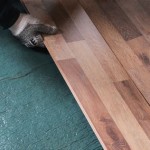
Once the subfloor is prepared, you can begin installing the cork flooring. The installation method will depend on the type of cork flooring you've chosen: click-lock or glued-down.
Click-Lock Cork Flooring Installation
This method is a popular choice for DIYers as it offers a floating installation that doesn't require adhesives. The planks interlock with each other, creating a strong and secure floor.
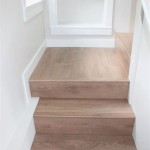
- Start in a Corner: Begin laying the first row of planks in a corner of the room. Ensure the planks are butted tightly together and aligned with the wall.
- Lay Subsequent Rows: Lay subsequent rows of planks, ensuring that the end joints of each plank are staggered to create a strong bond. Use a tapping block and mallet to gently tap the planks into place.
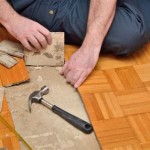
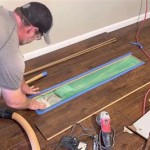
- Cut and Trim Planks: Use a utility knife or circular saw to cut and trim the planks to fit around obstacles and edges. Ensure that all cuts are made precisely to create a seamless finish.
- Install Expansion Gaps: Leave a gap of ¼ inch around the perimeter of the room to accommodate expansion and contraction due to temperature changes.
Glued-Down Cork Flooring Installation
Glued-down cork flooring offers a highly durable and secure installation, suitable for high-traffic areas. This method requires a specialized adhesive specifically designed for cork flooring.
- Spread Adhesive: Apply a thin, even layer of cork flooring adhesive to the prepared subfloor. Use a notched trowel to ensure consistent coverage and prevent over-application.
- Lay the Cork Tiles: Place the cork tiles directly onto the adhesive, pressing them down firmly to ensure complete adhesion. Work in small sections to prevent the adhesive from drying too quickly.
- Use a Roller: Once the tiles are laid, roll the entire flooring area with a heavy roller to ensure complete adhesion and eliminate any air bubbles.
- Cure Time: Allow the adhesive to cure completely according to the manufacturer's instructions before applying any additional sealant.
Finishing Touches
Once the cork flooring is installed, it is essential to apply a sealant to protect it from stains and moisture. The type of sealant will depend on the specific cork flooring and the desired finish. Here are some finishing touches to consider:
- Apply Sealant: Choose a sealant designed for cork flooring and apply it according to the manufacturer's instructions. It is advisable to apply multiple coats for optimal protection.
- Install Trim and Molding: Install trim and molding around the perimeter of the room to create a finished look and hide any expansion gaps.
- Clean the Floor: Once the sealant is dry, thoroughly clean the floor to remove any dust or debris. Use a soft, damp cloth and a mild cleaner specifically designed for cork flooring.

Complete Guide To Cork Flooring Installation Deerfoot Carpet

Complete Guide To Cork Flooring Installation Deerfoot Carpet

How To Install Cork Tile Flooring Diy Family Handyman

How To Install Cork Flooring Material 8 Simple Steps Building Renewable

How To Install Cork Flooring Angi

Eco Friendly Cork Flooring A Comprehensive Guide

How To Install Cork Tile Flooring Diy Family Handyman

Diy Cork Flooring Installation Guide Transform Your Home Yourself

How To Install Cork Tile Flooring Diy Family Handyman

How To Install Cork Floor Forna Floating Flooring Icork
See Also