Essential Considerations for Installing Lifeproof Vinyl Plank Flooring in Bathrooms
Upgrading your bathroom floor with Lifeproof vinyl plank flooring can provide both style and functionality. However, ensuring a proper and durable installation requires careful planning and attention to detail.
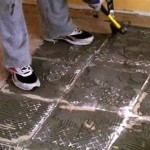
Pre-Installation Preparation
Before beginning installation, ensure the bathroom floor is leveled and free of debris or imperfections. Clean the subfloor thoroughly to remove any dust, dirt, or moisture. Additionally, remove any baseboards, moldings, or fixtures that may obstruct the installation.
Moisture Control
Bathrooms are prone to moisture, so it's crucial to protect the vinyl flooring from potential damage. Install a moisture barrier, such as an underlayment or vapor barrier, between the subfloor and the vinyl planks. This barrier will prevent moisture from seeping into the flooring and causing warping or buckling.
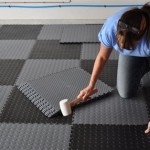
Underlayment
An underlayment provides cushion and soundproofing for the vinyl planks. Choose an underlayment specifically designed for vinyl flooring, such as cork or foam, to ensure proper support and insulation.
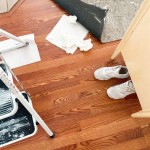
Plank Layout
Plan the layout of the vinyl planks before installation to minimize waste and ensure a cohesive appearance. Start by measuring the bathroom and determining the center point. Use a chalk line to mark the center and lay out the first row of planks perpendicular to the entrance. Ensure the planks are staggered, with the end seams of each plank offset by at least 6 inches from the seams of the adjacent rows.
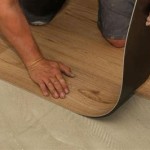
Installation Method
Lifeproof vinyl planks can be installed using either glue or a click-lock system. For glued installations, apply a thin layer of adhesive to the subfloor and lay the planks accordingly. For click-lock systems, simply align the planks and click them into place, creating a watertight and durable connection.
Finishing Touches
Once the vinyl planks are installed, reinstall the baseboards and moldings. Use caulk or sealant to fill any gaps between the planks and the walls or fixtures to prevent moisture penetration. Allow the flooring to cure for 24 hours before walking on it or exposing it to excess water.
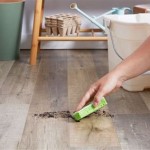
Maintenance and Care
To preserve the beauty and durability of your Lifeproof vinyl plank flooring, regular maintenance is essential. Sweep or vacuum regularly to remove loose dirt or debris. Use a damp mop or cleaning solution designed specifically for vinyl flooring to clean spills and stains. Avoid using harsh chemicals or abrasive materials that may damage the finish.
By following these essential steps, you can ensure the successful installation of Lifeproof vinyl plank flooring in your bathroom, creating a stylish and water-resistant floor that will enhance the aesthetics and functionality of your space.

Installing Vinyl Plank Flooring Lifeproof Waterproof Rigid Core Sustain My Craft Habit

How To Install Vinyl Plank Flooring In A Bathroom Fixthisbuildthat

Lifeproof Vinyl Floor Installation Perfect For Kitchens Bathrooms

How To Install Vinyl Plank Flooring In A Bathroom

Installing Vinyl Plank Flooring Lifeproof Waterproof Rigid Core Sustain My Craft Habit

How To Install Vinyl Plank Flooring In A Bathroom As Beginner Home Renovation

How To Install Vinyl Plank Flooring In A Bathroom Fixthisbuildthat

How To Install Vinyl Plank Flooring In A Bathroom

Lifeproof Vinyl Floor Installation Perfect For Kitchens Bathrooms

Why We Chose Lifeproof Vinyl Flooring And How To Install It
See Also