Installing Lifeproof Vinyl Plank Flooring in Multiple Rooms at Once
Installing Lifeproof vinyl plank flooring throughout your home can transform its appearance, increasing its value and comfort. While this project may seem daunting, it's achievable with careful planning and execution. Here's a comprehensive guide on how to install Lifeproof vinyl plank flooring in multiple rooms simultaneously.
Planning and Preparation
1. Measure and Order: Accurately measure the square footage of each room and order sufficient flooring planks, underlayment, and transition pieces.
2. Acclimatize the Planks: Before installation, store the Lifeproof vinyl planks in the rooms where they will be installed for 24-48 hours. This allows them to acclimatize to the room temperature and humidity.
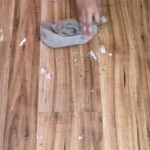
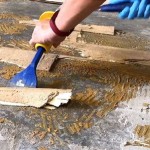
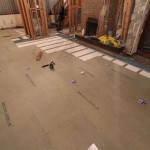
3. Prepare the Subfloor: Ensure the subfloor is flat, dry, and free of debris. Repair any imperfections or level the floor using a self-leveling compound.
Installation Process
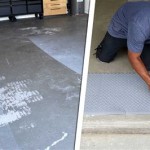
4. Install the Underlayment: Roll out the underlayment over the prepared subfloor, overlapping the seams and taping them together with underlayment tape.
5. Start in a Corner: Begin laying the Lifeproof vinyl planks from a corner of the room, ensuring the planks are parallel to the longest wall.
6. Use a Floating Floor Installation Method: Lifeproof vinyl planks use a floating floor installation method, where they click together without the need for glue or nails.
7. Stagger the Planks: To avoid creating visible seams, stagger the starting points of each row of planks by at least 12 inches.
Connecting Multiple Rooms
8. Transition Pieces: When installing flooring in multiple rooms, transition pieces are necessary to connect the different areas. These pieces can include T-moldings, reducers, or end caps.
9. Expansion Gaps: Leave a small expansion gap around the perimeter of the rooms and around any fixed objects to allow for natural movement of the flooring.
Finishing Touches
10. Remove Spacers: Once the flooring is installed, carefully remove the spacers you used along the walls.
11. Install Baseboards: Install baseboards or moldings to cover the expansion gap and complete the professional look.
Tips for Success
1. Use a Sharp Utility Knife: A clean, sharp utility knife will ensure precise cuts when trimming the planks.
2. Tap the Planks Together: Use a tapping block or rubber mallet to gently tap the planks together until they click securely.
3. Clean as You Go: Regularly clean up any dust or debris that accumulates during installation, ensuring the planks remain free of dirt.
4. Allow for Curing: After installation, allow the flooring to cure for at least 24 hours before exposing it to heavy traffic.
By following these steps and paying attention to detail, you can successfully install Lifeproof vinyl plank flooring throughout multiple rooms in your home, creating a beautiful and durable floor that will enhance your living space.
Which Direction To Lay Vinyl Plank Flooring In Multiple Rooms Step By Guide 2024

Vinyl Plank Flooring In Multiple Rooms Hallways

So You Re Thinking Of Installing Lifeproof Flooring Just Call Me Homegirl

Why We Chose Lifeproof Vinyl Flooring And How To Install It

20 Tips For A Great Vinyl Plank Flooring Installation

Installing Vinyl Plank Flooring How To Fixthisbuildthat

Lvp Flooring Installation How To Install Luxury Vinyl Plank In A Basement Diy

Installing Vinyl Plank Flooring How To Fixthisbuildthat

How To Install Vinyl Plank Flooring Diy Home Improvement Blog

How To Install Lifeproof Vinyl Flooring Bent S Woodworking
See Also