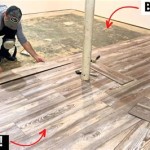
Installing Trim on Laminate Flooring: A Comprehensive Guide
Installing trim around laminate flooring is an essential finishing touch that enhances the aesthetics of your space and conceals unsightly gaps between the flooring and walls. Whether you're a seasoned DIYer or tackling this project for the first time, this step-by-step guide will provide you with the knowledge and guidance to complete the job like a pro.
Step 1: Gather Your Materials
To install trim on laminate flooring, you'll need the following materials:
- Base molding
- Quarter-round (optional)
- Miter saw or hand saw
- Tape measure
- Carpenter's square
- Nail gun or hammer and nails
- Wood filler
- Caulk gun and caulk
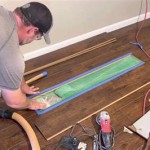
Step 2: Measure and Cut the Base Molding
Start by measuring the length of each wall where you'll be installing the trim. Cut the base molding to the appropriate length using a miter saw for clean, angled cuts. If you don't have access to a miter saw, you can use a hand saw and a carpenter's square to make the cuts.
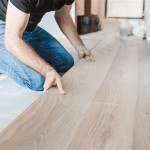
Step 3: Install the Base Molding
Align the base molding along the wall, ensuring it fits snugly against the flooring. Use a nail gun or hammer and nails to secure the molding every 16-24 inches. Drive the nails in at an angle so they're concealed within the grooves of the molding.
Step 4: Install Quarter-Round Molding (Optional)
Quarter-round molding is a small, curved molding that fills the gap between the base molding and the floor. Cut the quarter-round molding to length and use a finish nailer or adhesive to secure it to the base molding.
Step 5: Fill Nail Holes and Caulk Gaps
Once the trim is installed, fill any nail holes or gaps between the trim and the wall using wood filler. Allow the wood filler to dry completely before sanding it smooth.
Step 6: Caulk the Trim
To prevent moisture from seeping into the gaps around the trim, apply a thin bead of caulk between the trim and the wall. Use a caulk gun to apply the caulk and smooth it out with your finger.
Step 7: Touch-Ups
Once the caulk has dried, inspect the trim for any imperfections. Touch up any scratches or dents with a touch-up pen or paint that matches the color of the trim.
Tips for Success
* Use a sharp blade on your miter saw to ensure clean, precise cuts. * Double-check the measurements before cutting the trim to avoid costly mistakes. * Start by installing the base molding in a corner, as this will provide a stable starting point. * Don't over-nail the trim, as this could split the wood. * Let the wood filler dry completely before sanding to ensure a smooth finish. * Use a high-quality caulk to prevent moisture damage. By following these steps, you can successfully install trim on laminate flooring and give your space a polished, professional look.
How To Install Laminate Flooring On Staircase Step By Guide

Laminate Flooring Installation A Step By Guide

The Ultimate Guide To Installing Laminate Flooring Parrys

Step By Guide For Hybrid Flooring Installation The Guys

How To Install Laminate Flooring On Stairs Direct Wood

Laying Laminate Flooring Attaching Trims

Laminate Flooring Installation Guide Step By Instructions

How To Install Laminate Flooring Beading

How To Install Baseboards In 4 Steps Bc Best Flooring

How To Install Floating Laminate Wood Flooring Part 3 The Finishing Touches Installing Diy Floors Transition Strips
See Also