Essential Aspects of Installing Unfinished Hardwood Flooring
Installing unfinished hardwood flooring is a rewarding home improvement project that can significantly enhance the beauty and value of your property. By following these essential steps, you can confidently achieve professional-looking results.1. Acclimation
Before installation, allow the unfinished hardwood planks to acclimate to the temperature and humidity of the room where they will be installed. This typically takes 3 to 5 days. Place the planks in their original packaging and keep them flat on the subfloor or on pallets.
2. Subfloor Preparation
Ensure that the subfloor is level, smooth, and free of defects. Fill any gaps or cracks with a self-leveling compound. If the subfloor is uneven, you may need to install a layer of plywood or underlayment to create a level surface.
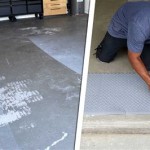
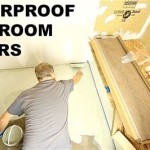
3. Moisture Barrier
Install a moisture barrier to protect the flooring from moisture vapor rising from the subfloor. Use a polyethylene film at least 6 mil thick and roll it out over the subfloor, overlapping the edges by 6 inches. Seal the seams with tape.
4. Underlayment
Install an underlayment to provide cushioning and sound insulation. Common options include cork, rubber, or felt. Roll out the underlayment over the moisture barrier and secure it with staples or tape.
5. Installation Methods
There are two main methods of installing unfinished hardwood flooring: nailing and stapling. Nailing the planks directly to the subfloor provides a more secure hold but requires more skill and precision. Stapling the planks to the underlayment is easier and less labor-intensive but may not be as durable.
6. Planking Layout
Plan the layout of the planks to achieve the desired pattern and avoid unnecessary waste. Begin by installing a straight row along the longest wall and continue adding rows parallel to it. Leave a 1/4-inch gap between the planks for expansion.
7. Finishing
Once the flooring is installed, you can customize its appearance by sanding, staining, and sealing it. Sanding removes any irregularities and prepares the surface for staining or finishing. Apply the desired stain and then seal the flooring with a polyurethane finish for protection.
8. Maintenance
Regular maintenance is crucial to preserve the beauty and longevity of unfinished hardwood flooring. Sweep or vacuum regularly to remove dust and debris. Use a damp mop with a mild cleaning solution to clean the floor, and avoid using harsh chemicals or cleaners.
By following these essential aspects, you can confidently install stunning unfinished hardwood flooring that will enhance the elegance and value of your home.
Unfinished Hardwood Floors Installation Floor Refinishing New Jersey Repair Sanding

Advantages Of Unfinished Hardwood Floors Floor Refinishing

Pre Finished Versus Unfinished Hardwood Floors Highland Flooring Refinishing Installation And Repair

Prefinished Vs Unfinished Hardwood Floors Svb Wood

Advantages Of Unfinished Hardwood Floors Ambience Flooring

Hardwood Flooring Installation Svb Wood Floors

Prefinished Vs Unfinished Hardwood Flooring Cost And Pros Cons

Guide How To Install A Solid Hardwood Floor

Differences In Installation Part 2 Pre Finished Vs Unfinished Hardwoods

New Hardwood Flooring Installation Process Barnum Floors
See Also