Installing Vinyl Plank Flooring in a Bathroom Without Window: A Comprehensive Guide
Vinyl plank flooring has become increasingly popular in bathrooms due to its durability, water resistance, and stylish appearance. However, installing vinyl planks in a bathroom without a window presents unique challenges that require careful consideration.
1. Ventilation is Paramount
Since there's no natural ventilation, proper air circulation is crucial to prevent moisture buildup and mold growth. Ensure adequate ventilation by installing an exhaust fan in the bathroom and keeping it running during and after showers or baths.
2. Moisture-Resistant Underlayment
Choose a moisture-resistant underlayment to protect your vinyl planks from moisture. It helps reduce moisture penetration and provides insulation, increasing comfort and reducing sound transmission.
3. Adhesive or Floatation: Choosing the Right Method
Vinyl planks can be installed using either glue-down or floatation methods. For bathrooms without windows, the floatation method is recommended. Floatation planks are designed to lock together without adhesive, making installation easier and preventing moisture penetration.
4. Cutting and Installing
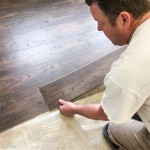
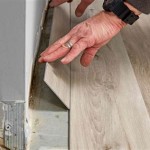
Use a sharp utility knife to cut the vinyl planks precisely. Start laying them in a straight line along the longest wall. Avoid staggering joints by more than 6 inches, and make sure to leave a 1/4-inch expansion gap around the perimeter. Use spacers to ensure even spacing between planks.
5. Sealing Joints and Corners
To prevent moisture penetration, seal all joints and corners using a high-quality caulk or sealant. Apply a thin bead of caulk along all seams and ensure it covers the edges of the planks for a watertight seal.
6. Transitioning to Other Flooring
If the bathroom connects to other rooms with different flooring, use transition pieces to create a smooth and seamless transition. Thresholds, T-moldings, or reducers can be used depending on the height difference between the two flooring surfaces.
7. Maintenance and Care
Regular maintenance is essential to keep your vinyl plank flooring looking its best. Sweep or vacuum regularly to remove dirt and debris. Use a damp mop with a mild detergent for cleaning, and avoid harsh chemicals or abrasive cleaners that can damage the planks.
Additional Tips:
- Turn off the water supply and drain all plumbing fixtures before starting the installation.
- Allow the vinyl planks to acclimate to the room temperature for at least 24 hours before installing.
- Use a moisture meter to check for any excess moisture in the subfloor before installing.
- Consider using a dehumidifier in the bathroom to control moisture levels.
Conclusion
By following these steps and considering the unique challenges of installing vinyl plank flooring in a bathroom without a window, you can achieve a durable, moisture-resistant, and stylish floor that will enhance your bathroom's aesthetics.

Can I Install Vinyl Planks In Bathrooms Signature Flooring Floor Tiles

Install L And Stick Vinyl Floor Planks In The Bathroom More To Mrs E

Dos And Don Ts For Installing Vinyl Plank Floors In The Bathroom Advice Homeowners

How To Fit Vinyl Flooring In A Bathroom Turning House Into Home

Dos And Don Ts For Installing Vinyl Plank Floors In The Bathroom Advice Homeowners

How To Fit Vinyl Flooring In A Bathroom Turning House Into Home

Installing Vinyl Plank Flooring How To Fixthisbuildthat

How To Install Vinyl Plank Flooring In A Bathroom Fixthisbuildthat

How To Fit Vinyl Flooring In A Bathroom Turning House Into Home

How To Install L And Stick Vinyl Tiles Houseful Of Handmade
See Also


