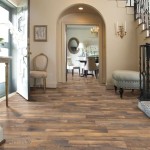
Installing Vinyl Plank Flooring On Bathroom Walls
Vinyl plank flooring has become a popular choice for bathroom floors due to its water resistance and durability. However, its versatility extends beyond flooring; vinyl planks can also be installed on bathroom walls to create a stylish and waterproof surface. This application offers a unique aesthetic and simplifies cleaning, making it an increasingly popular trend in bathroom renovations. This article provides a step-by-step guide for installing vinyl plank flooring on bathroom walls.
Preparing the Walls
Proper wall preparation is crucial for a successful installation. The surface must be clean, dry, and level. Any existing wallpaper should be removed, and any imperfections, like cracks or holes, should be filled and sanded smooth. Glossy surfaces should be lightly sanded to create a better bonding surface for the adhesive. For optimal results, apply a primer specifically designed for use with vinyl plank flooring. This primer helps to ensure proper adhesion and prevents moisture issues.
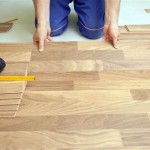
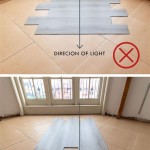
Consider the layout before beginning the installation process. Vertical installation can create an illusion of height, while horizontal installation can make the room appear wider. Plan the layout carefully, accounting for cuts and ensuring a symmetrical appearance, particularly around fixtures and windows. Dry fitting the planks before applying adhesive is highly recommended to avoid mistakes and ensure accurate measurements.
Choosing the Right Adhesive
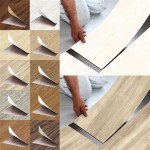
Selecting the appropriate adhesive is essential for the longevity and stability of the installation. Use a high-quality construction adhesive specifically designed for vinyl flooring and suitable for wet environments. Ensure the adhesive is compatible with the specific type of vinyl plank being used. Some vinyl planks come with a self-adhesive backing, which simplifies the installation process. However, for bathroom applications, especially in shower areas, using a separate adhesive is often recommended for enhanced water resistance and durability.
Installation Process
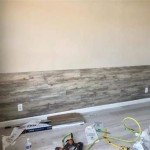
Begin the installation from a corner, working either horizontally Row by row or vertically, column by column. Apply the adhesive to the back of each plank evenly, ensuring full coverage. Then, firmly press the plank against the wall, holding it in place for a few seconds to allow the adhesive to grab. Use spacers to maintain consistent gaps between planks, accommodating for expansion and contraction. These gaps will later be concealed by caulk.
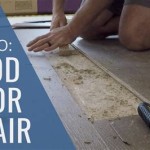
Cutting planks to fit around fixtures and corners requires precision. Use a measuring tape and a utility knife or a fine-toothed saw for clean cuts. For intricate cuts around pipes or other obstacles, create templates from cardboard for accurate tracing and cutting. Ensure a snug fit around all fixtures for a professional finish.
Finishing Touches
Once the installation is complete, allow the adhesive to fully cure according to the manufacturer's instructions. After the curing period, apply a waterproof caulk along the seams between the planks and around any fixtures. This creates a seamless, watertight seal, preventing moisture from penetrating behind the planks. Choose a caulk that matches the color of the vinyl planks for a cohesive look.
Consider installing trim pieces around the edges of the wall to provide a neat and finished appearance. These trim pieces can also help to conceal any gaps between the planks and the adjacent surfaces. Choose trim that complements the style of the vinyl planks and the overall bathroom design. Trim can be secured using adhesive or small nails.
Maintenance and Care
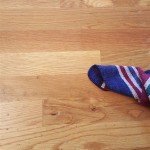
Maintaining the vinyl plank walls is relatively straightforward. Regular cleaning with a damp cloth and mild detergent is usually sufficient. Avoid using abrasive cleaners or harsh chemicals, as they can damage the surface of the vinyl. For stubborn stains, a non-abrasive cleaner specifically designed for vinyl flooring can be used. Ensure the walls are properly ventilated to prevent moisture buildup, especially after showering or bathing. Proper ventilation helps to extend the lifespan of the vinyl plank walls and prevent the growth of mold and mildew.

How To Install Vinyl Plank Flooring In A Bathroom Fixthisbuildthat

Installed Vinyl Plank Flooring On My Bathroom Wall Love The Texture Color Walls

Vinyl Planks In Bathrooms Residential Inspiration Flooring

Installing Lvt On A Wall

Installing Vinyl Plank Flooring Lifeproof Waterproof Rigid Core Sustain My Craft Habit

Can Vinyl Flooring Be Used On Walls And Shower In Singapore Property

How To Install Vinyl Plank Flooring In A Bathroom As Beginner Home Renovation

How To Install Vinyl Plank Flooring In A Bathroom Fixthisbuildthat

Dos And Don Ts For Installing Vinyl Plank Floors In The Bathroom Advice Homeowners

Achieve High End Hardwood Looks For Your Dream Bath In Lvt
See Also