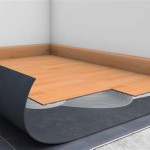
Laying Vinyl Flooring: A Comprehensive Guide to Construction
Vinyl flooring has become increasingly popular due to its durability, affordability, and ease of installation. Whether you're a seasoned pro or a DIY enthusiast, this comprehensive guide will provide you with the essential steps and considerations for laying vinyl flooring.
1. Preparation: Setting the Stage
Before laying vinyl flooring, it's crucial to prepare the subfloor. Ensure it is smooth, level, and free from moisture. Any imperfections or unevenness can affect the final installation, so it's essential to address them beforehand.
2. Measuring and Cutting: Precision is Key
Measure the area where you'll be installing the vinyl flooring accurately. Use a sharp utility knife or a vinyl cutter to cut the planks according to these measurements. Precision is crucial to ensure a seamless and aesthetically pleasing installation.
3. Adhesive and Plinths: Bonding and Support
Spread an adhesive evenly over the subfloor according to the manufacturer's instructions. Carefully place the vinyl planks onto the adhesive and press them firmly. Use a roller or weighted object to enhance adhesion. Plinths are installed around the edges of the flooring to conceal expansion gaps and provide support.
4. Dry-Laying for Preview: A Smart Move
Before adhering the vinyl planks, dry-lay them on the subfloor to visualize the layout and ensure accuracy. This step allows you to adjust the placement and make necessary adjustments before permanently fixing them in place.
5. Expansion Gaps: Allowing for Movement
Vinyl flooring expands and contracts based on temperature and humidity changes. To accommodate this movement, leave expansion gaps around the edges of the room and around any obstacles. These gaps ensure the flooring won't buckle or warp.
6. Continuity and Transitions: Seamless Transitions
When installing multiple rooms or transitioning from one flooring type to another, it's important to ensure continuity. Stagger the joints of the vinyl planks and use transition moldings to create smooth transitions between different surfaces.
7. Cleaning and Maintenance: Preserving Beauty
Once the vinyl flooring is installed, clean it thoroughly to remove any adhesive residue or dirt. Regular cleaning with a microfiber mop and a pH-neutral cleaner will help maintain its appearance and extend its lifespan.
Conclusion: A Satisfying and Cost-Effective Option
Laying vinyl flooring is a satisfying and cost-effective project that can transform your home. By following these essential steps and considerations, you can achieve a professional-looking installation that will enhance the ambiance and functionality of your space for years to come.

Vinyl Tile Installation A Comprehensive Guide Gc Flooring Pros

A Complete Guide How To Stagger Vinyl Plank Flooring Whole Cabinet Supply

How To Install Vinyl Floors

Vinyl Floor Tiles Complete Guide To Pvc And Installation

Ultimate Guide On How To Install Vinyl Flooring Oneplus

How To Install Vinyl Plank Flooring The Home

Adhesive Vinyl Flooring 4 Ways To Install Planeo

A Beginner S Guide To Installing Vinyl Plank Flooring Dumpsters Com

Which Direction Should I Lay Vinyl Plank Flooring

Vinyl Floor Tiles Complete Guide To Pvc And Installation
See Also


