Laying Vinyl Flooring: A Comprehensive Guide To Construction and Maintenance
Vinyl flooring offers a durable, cost-effective, and aesthetically versatile solution for various residential and commercial spaces. Proper installation and diligent maintenance are crucial for maximizing the lifespan and preserving the appearance of vinyl flooring. This guide provides a comprehensive overview of the process, from subfloor preparation to ongoing care.
Subfloor Preparation: The Foundation of a Successful Installation
A smooth, level, and clean subfloor is paramount for a successful vinyl flooring installation. Imperfections in the subfloor can telegraph through the vinyl, creating an uneven surface and potentially damaging the material over time. Existing flooring materials, such as carpet, tile, or other resilient flooring, should be removed completely.
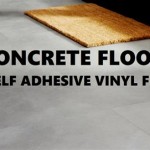
Concrete subfloors should be assessed for cracks, unevenness, and moisture. Cracks should be filled with an appropriate patching compound, and significant unevenness should be addressed by grinding or leveling. A moisture test is essential to ensure the concrete is sufficiently dry for vinyl installation. Excessive moisture can lead to adhesive failure and mold growth beneath the flooring.
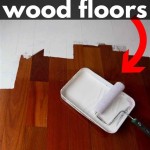
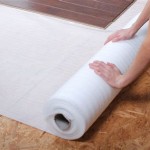
Wood subfloors necessitate similar scrutiny. Loose boards should be secured, and any significant height variations should be sanded down. A layer of plywood underlayment can provide a smoother, more stable surface for the vinyl.
Types of Vinyl Flooring and Installation Methods
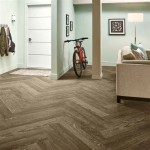
Vinyl flooring comes in several forms, each with its own installation method. Sheet vinyl is available in large rolls and is typically glued down. Vinyl tiles and planks offer greater design flexibility and can be installed using adhesive or a click-lock system. Luxury vinyl plank (LVP) and luxury vinyl tile (LVT) are thicker and more durable options that often feature a click-lock installation system.
Glue-down installations require a full-spread adhesive specifically designed for vinyl flooring. The adhesive is applied to the subfloor with a trowel, and the vinyl is carefully positioned and pressed into place. Click-lock systems involve interlocking the edges of the planks or tiles, creating a floating floor that does not require adhesive.
Acclimation and Layout
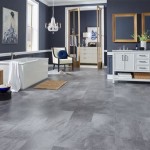
Before installation, the vinyl flooring should be allowed to acclimate to the room's temperature and humidity for a period specified by the manufacturer. This helps prevent expansion or contraction after installation. Careful planning of the layout is essential for minimizing waste and ensuring a visually appealing result. Consider the direction of natural light and the overall flow of the space.
Installation Best Practices
During installation, it's crucial to follow the manufacturer's instructions precisely. Using the correct tools and techniques will ensure a successful and long-lasting result. For glue-down installations, ensuring adequate adhesive coverage and proper rolling pressure is vital. For click-lock systems, maintaining consistent spacing and avoiding excessive force are key considerations.
Post-Installation Considerations
After installation, allow sufficient time for the adhesive to cure or the click-lock system to settle before placing furniture or heavy objects on the floor. Installing transition strips between different flooring materials provides a smooth and professional finish.
Regular Maintenance for Long-Lasting Beauty
Proper maintenance is essential for preserving the beauty and extending the lifespan of vinyl flooring. Regular sweeping or vacuuming removes dirt and debris that can scratch the surface. Damp mopping with a mild cleaning solution is recommended for deeper cleaning.
Avoid using abrasive cleaners, harsh chemicals, or steel wool, as these can damage the vinyl's protective layer. Spills should be cleaned up promptly to prevent staining. Furniture pads can help protect the flooring from scratches and dents. In high-traffic areas, consider using mats or rugs to minimize wear and tear.
Addressing Specific Issues and Repairs
Minor scratches can sometimes be buffed out with a soft cloth and a vinyl floor polish. For more significant damage, such as tears or gouges, a patch repair might be necessary. Loose tiles or planks in a click-lock system can often be re-secured. Addressing issues promptly can prevent further damage and prolong the life of the flooring.
Understanding Warranty Information
Familiarize yourself with the manufacturer's warranty information. Warranties typically cover manufacturing defects and may vary in duration. Proper installation and maintenance are often prerequisites for warranty coverage.

Vinyl Tile Installation A Comprehensive Guide Gc Flooring Pros

A Beginner S Guide To Installing Vinyl Plank Flooring Dumpsters Com

Your Step By Guide How To Install Luxury Vinyl Plank Wc Supply Whole Cabinet

How To Install Diffe Vinyl Floors Angling Push Down Installation Tutorial For Beginners Tarkett

Spc Flooring Installation A Comprehensive Guide

How To Lay Sheet Vinyl Flooring Installation 2024 Full Guide

The Complete Guide To Everything About Vinyl Flooring

20 Tips For A Great Vinyl Plank Flooring Installation

4 Tips To Keep Your Vinyl Plank Flooring Looking New

Navigating Flooring In Construction Work A Comprehensive Guide To Types And Considerations Vertex
See Also