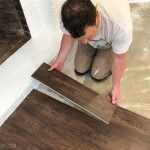
Laying Vinyl Plank Flooring On Concrete: A Comprehensive Guide
Vinyl plank flooring has become increasingly popular due to its durability, ease of installation, and stylish appearance. If you're considering laying vinyl plank flooring on concrete, here's a comprehensive guide to help you achieve a flawless finish.
1. Preparation: Ensuring a Solid Foundation
A properly prepared subfloor is crucial for a successful vinyl plank installation. Ensure that the concrete is clean, level, and free of any debris or moisture. If necessary, use a concrete patching compound to repair any cracks or holes.
2. Acclimation: Allowing for Expansion
Before installation, allow the vinyl planks to acclimate to the temperature and humidity of the room where they will be laid. This process takes about 24-48 hours. Keep the planks in their sealed packaging until ready to use.
3. Underlayment: Adding Comfort and Insulation
An underlayment provides additional cushioning, noise reduction, and moisture protection. Choose an underlayment specifically designed for vinyl plank flooring and lay it over the prepared concrete subfloor.
4. Layout: Establishing a Straight Starting Point
Determine the center point of the room and establish a straight starting line perpendicular to the longest wall. Use a chalk line or laser level to ensure accuracy. This line will serve as a guide for the first row of planks.
5. Installation: Click-Lock or Glue-Down Method
Vinyl planks come in either a click-lock or glue-down installation system. For a click-lock system, simply align the planks and click them together. For a glue-down system, apply adhesive to the subfloor and the back of the plank before pressing it into place.
6. Trimming: Fitting Around Obstacles
To fit planks around obstacles like walls, pipes, or doorways, use a utility knife or oscillating tool to trim them to size. Measure carefully and make precise cuts to ensure a clean and flush fit.
7. Transition Moldings: Finishing Touches
Transition moldings provide a smooth transition between different flooring surfaces, such as vinyl plank and carpet or tile. Install transition moldings where necessary to create a seamless look.
8. Compacting: Ensuring a Secure Hold
Use a flooring roller or heavy object to compact the planks after they are installed. This will ensure that they are properly seated and prevent them from shifting or buckling.
9. Cleaning: Removing Excess Material
Once the installation is complete, clean the floor to remove any dust, debris, or adhesive residue. Use a damp mop or vacuum cleaner with a soft brush attachment to avoid scratching the vinyl surface.
10. Maintenance: Preserving the Beauty
To maintain the beauty and longevity of your vinyl plank flooring, follow these tips: Sweep or vacuum regularly, clean spills immediately, avoid placing heavy furniture directly on the floor, and use a floor protector under chairs and tables.
Laying vinyl plank flooring on concrete is a relatively straightforward DIY project. By following these steps and paying attention to detail, you can achieve a professional-looking and durable floor that will enhance the aesthetics of your home for years to come.

Easy Ways To Install Vinyl Plank Flooring On Concrete

How To Prepare A Concrete Floor For Vinyl Flooring Parrys

Easy Ways To Install Vinyl Plank Flooring On Concrete

Tips For Installing Vinyl Plank Over Concrete Floors Lemon Thistle

How To Install Vinyl Or Laminate Floors In A Basement Over Concrete Slab

Easy Ways To Install Vinyl Plank Flooring On Concrete

10 Beginner Mistakes Installing Vinyl Plank Flooring

Tips For Installing Vinyl Plank Over Concrete Floors Lemon Thistle

Tips And Tricks For Installing Vinyl Plank Over Concrete Floors Riverbend Interiors

How To Prepare A Floor For Vinyl Plank Installation 2024
See Also


