Laying Vinyl Plank On Concrete Floor: A Comprehensive Guide
Transforming your concrete floor with vinyl planks is a practical and stylish home improvement project that can significantly elevate your space's aesthetics. Vinyl planks, known for their durability, water resistance, and ease of installation, make them an excellent choice for high-traffic areas or rooms prone to moisture, such as bathrooms and kitchens.
Laying vinyl plank on concrete floor requires meticulous preparation and attention to detail to ensure a flawless and long-lasting installation. This comprehensive guide will walk you through every step of the process, from materials gathering to the final touches.
Materials Required
- Vinyl planks
- Underlayment
- Concrete adhesive
- Concrete leveling compound, if necessary
- Chalk line or laser level
- Tape measure
- Utility knife
- Tapping block or rubber mallet
- Clean cloths
Preparatory Work
Ensure your concrete floor is in good condition. Remove any existing flooring, paint, or debris. Repair any cracks or holes with concrete leveling compound. The surface must be smooth, flat, and dry before installation.
Clean the concrete floor thoroughly using a degreaser or mild detergent to remove any dirt or oil that could interfere with the adhesive bond.
Laying the Underlayment
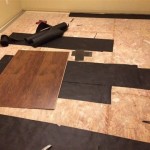
Underlayment is a thin layer of padding placed between the concrete floor and vinyl planks to provide additional sound and moisture insulation. Cut the underlayment to size and lay it out over the entire floor surface, overlapping the seams slightly.
Secure the underlayment using concrete adhesive applied in dots or strips. Ensure it adheres properly before proceeding.
Installing the Vinyl Planks
Start by determining the center point of the room and snapping a chalk line or using a laser level to establish a straight starting point. If necessary, cut the first plank lengthwise to ensure a tight fit against the wall.
Apply concrete adhesive evenly to the back of the first plank using a notched trowel. Lower the plank into place, aligning it with the chalk line. Tap it gently with a tapping block or rubber mallet to secure it.
Continue laying the planks in a staggered pattern, pressing each plank firmly into place against the previous one. Use a pry bar or tapping block to close any gaps between planks.
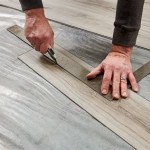
Trim the last row of planks to fit the perimeter of the room using a utility knife. Ensure a snug fit against the wall or molding.
Finishing Touches
Once all the planks are installed, use a clean cloth to wipe away any excess adhesive. If desired, install baseboards or quarter-round molding to cover the expansion gap around the perimeter.
Allow the adhesive to cure completely as per the manufacturer's instructions before walking or placing furniture on the new floor.
Maintenance
Maintaining your vinyl plank floor is relatively easy. Sweep or vacuum regularly to remove dirt and debris. Use a mild detergent or vinyl plank cleaner to mop the floor periodically, avoiding harsh chemicals or abrasive cleaners.
Protect the floor from scratches by placing felt pads under furniture legs. Keep sharp objects and spills away to prevent damage.
Conclusion
Laying vinyl plank on concrete floor is an achievable project with the right preparation and attention to detail. By following the steps outlined in this guide, you can create a durable, stylish, and water-resistant floor that will enhance the beauty and functionality of your space for years to come.

Tips For Installing Vinyl Plank Over Concrete Floors Lemon Thistle

How To Install Vinyl Plank Over Concrete Orc Week 4 5 The Happy Housie

How To Prepare A Concrete Floor For Vinyl Flooring Parrys

Vinyl Plank Flooring On Uneven Concrete

Easy Ways To Install Vinyl Plank Flooring On Concrete

Tips For Installing Vinyl Plank Over Concrete Floors Lemon Thistle

Easy Ways To Install Vinyl Plank Flooring On Concrete

Lvp Flooring Installation How To Install Luxury Vinyl Plank In A Basement Diy

How To Install Vinyl Plank Over Concrete Orc Week 4 5

How To Install Vinyl Plank Flooring Lifeproof Over Concrete
See Also


