Essential Aspects of Lifeproof Rigid Core Luxury Vinyl Flooring Installation Instructions
Installing Lifeproof Rigid Core Luxury Vinyl Flooring (LVF) can elevate the aesthetics of your home while providing exceptional durability and functionality. To achieve a successful installation, it's crucial to follow the manufacturer's instructions meticulously. This guide will illuminate the essential aspects of Lifeproof LVF installation, empowering you to undertake this project with confidence.
1. Preparation is Paramount
Before embarking on the installation process, thorough preparation is essential. Ensure the subfloor is level, flat, and clean. Remove any existing floor coverings, baseboards, and quarter rounds. The subfloor should be structurally sound, free from moisture, and have a maximum deflection of 1/8 inch over a 10-foot span.
2. Acclimate the Flooring
Prior to installation, allow the Lifeproof LVF to acclimate to the room's temperature and humidity for 48 hours. This process helps minimize expansion and contraction after installation, preventing buckling or gapping.
3. Plan the Layout
Determine the starting point and layout of the flooring planks. Consider the room's dimensions, traffic patterns, and the direction of natural light to optimize the appearance and durability of the flooring.
4. Install the Underlayment
Lifeproof LVF planks require the use of an underlayment. This layer provides additional sound absorption, moisture resistance, and thermal insulation. Unroll the underlayment perpendicular to the direction of the flooring planks and secure it with tape.
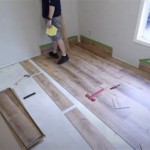
5. Dry-Fit the First Row
Place the first row of Lifeproof LVF planks loosely without clicking them together. This dry-fit step allows you to adjust the layout and ensure the planks align evenly with the starting point.
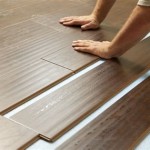
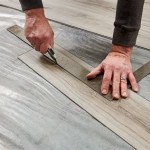
6. Start Clicking and Locking
Securely click and lock the first row of planks together at the ends and sides. Apply pressure to the joints to ensure a tight fit. As you install subsequent rows, continue clicking and locking the planks into place, working your way across the room.
7. Expand the Edge Pieces
To accommodate potential expansion, leave a 1/4-inch gap around the perimeter of the flooring. Use spacers to maintain the gap as you install the edge pieces. Trim the last row of planks to fit snugly against the wall.
8. Secure the Baseboards
Once the flooring is installed, reinstall the baseboards around the perimeter of the room. Use a miter saw to cut the baseboards at 45-degree angles for a professional finish.
9. Clean and Enjoy
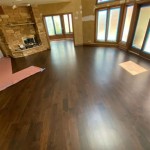
Sweep or vacuum the newly installed floor to remove any debris. Enjoy the beauty and functionality of your Lifeproof Rigid Core Luxury Vinyl Flooring for years to come.
Additional Tips:
- Use a tapping block and hammer to ensure the planks are fully locked together.
- Stagger the end joints of adjacent rows by at least 6 inches.
- Avoid installing the flooring in direct sunlight or extreme temperatures.
- Allow the flooring to cure for 24 hours before moving furniture or applying heavy loads.
- Follow the manufacturer's warranty instructions to maintain the integrity of your Lifeproof LVF.

How To Install Lifeproof Vinyl Flooring

How To Install Lifeproof Flooring The Home

How To Install Lifeproof Flooring The Home

How To Install Vinyl Plank Flooring Lifeproof Lvp

How To Install Lifeproof Flooring The Home

Lifeproof Manuals

How To Install Vinyl Plank Flooring Lifeproof Lvp

Installation Of Lifeproof Lvp Luxury Vinyl Flooring Plank How To Install Sterling Oak

Installing Vinyl Plank Flooring Lifeproof Waterproof Rigid Core Sustain My Craft Habit

20 Tips For A Great Vinyl Plank Flooring Installation
See Also