Mastering Wood Flooring Installation: Essential Aspects for Flawless Results
Wood flooring installation requires meticulous attention to detail and a comprehensive understanding of the process. Mastering this craft ensures long-lasting, aesthetically pleasing floors that enhance the beauty and functionality of any space. Here are the essential aspects to consider for successful wood flooring installation:
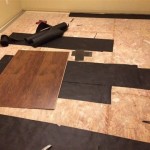
1. Subfloor Preparation
A solid and level subfloor is crucial for a stable and creak-free wood floor. Thoroughly inspect the subfloor for any imperfections, unevenness, or moisture issues. Address any problems with leveling compounds, shims, or underlayment to create a smooth and supportive base for the flooring.
2. Moisture Control
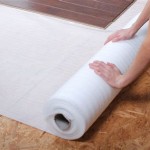
Wood flooring is susceptible to moisture damage, so it's imperative to control humidity levels throughout the installation process. Use a moisture meter to measure the moisture content of the subfloor and flooring material before and during installation. Ensure proper ventilation by opening windows or using a dehumidifier to maintain optimal humidity levels.
3. Acclimation
Acclimation is the process of allowing the wood flooring to adjust to the temperature and humidity of the installation environment. Unpack the flooring and store it in the room where it will be installed for at least 48 hours before beginning the process. This allows the wood to absorb moisture from the air and minimize gaps or buckling.
4. Adhesive Selection
Selecting the right adhesive is essential for the longevity of the flooring. Different adhesive types are formulated for specific subfloor conditions and flooring materials. Consult with flooring professionals to determine the appropriate adhesive for your installation based on factors such as subfloor type, moisture levels, and wood species.
5. Installation Techniques
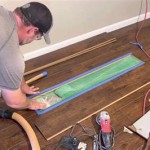
There are two primary installation techniques for wood flooring: nailing and floating. Nailing involves securing the flooring to the subfloor with nails, while floating involves locking the planks together without adhering them directly to the subfloor. The appropriate installation method depends on the flooring type, subfloor, and desired effect.
6. Expansion Gaps
Expansion gaps are necessary to allow the wood flooring to expand and contract with changes in humidity and temperature. Leave a small gap around the perimeter of the room and any fixed objects to prevent buckling or damage.
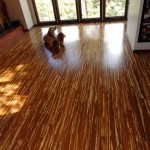
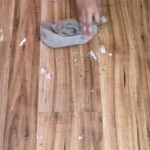
7. Surface Preparation and Finishing
Once the flooring is installed, it requires proper surface preparation and finishing. Sand the flooring lightly to remove any small imperfections or excess adhesive. Apply a suitable finish, such as oil, polyurethane, or wax, to protect the floor from wear, moisture, and scratches. Proper maintenance and regular cleaning ensure the enduring beauty and functionality of your wood flooring.

Mastering Floors Start At The Bottom Udemy

Mastering Engineered Hardwood Floor Care Top 8 Cleaning Tips

Mastering Acclimatisation Tips For Perfect Installation Of Laminate And Lvt Flooring

Mastering A Buffer For Floor Sanding Success Norton Abrasives

Achieving Flawless Floor Sanding Part 2

Expert Parquet Floor Sanding Diffeiating Herringbone Basket Square And 5 Finger Block Patterns

Mastering Underfloor Heating Installation Training Warmup

Unveiling Timeless Elegance Mastering Wood Floor Patterns Now

How To Prevent Damage While Buffing Your Floors Mr Sander

Common Challenges In Refinishing Parquet Floors Sanding Wood
See Also