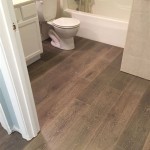
Removing Vinyl Flooring: A Comprehensive Guide
Vinyl flooring, known for its durability and affordability, can eventually require removal to make way for renovations or upgrades. The process of removing vinyl flooring involves several crucial steps, and proper execution ensures a smooth transition to your desired flooring choice.
Determining the Type of Vinyl Flooring
There are two main types of vinyl flooring: sheet vinyl and vinyl tiles. Sheet vinyl comes in large rolls and is glued down to the subfloor, while vinyl tiles are individual pieces that click or interlock together. Identifying the type of vinyl flooring you have will help you choose the appropriate removal method.
Safety Precautions
Before starting the removal process, it's essential to take necessary safety precautions. Vinyl flooring often contains asbestos, especially if it was installed before 1990. If you suspect asbestos presence, consider hiring a professional for safe removal.
Gathering Tools and Materials
To remove vinyl flooring effectively, you'll need the following tools and materials:
- Pry bar
- Floor scraper
- Utility knife
- Hammer
- dust mask
- Safety glasses
- Work gloves
Removing Sheet Vinyl
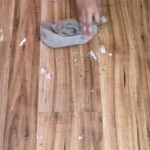
For sheet vinyl, begin by using a pry bar to loosen the edges of the flooring from the subfloor. Once the edges are lifted, use a floor scraper to remove the adhesive underneath. Be careful not to damage the subfloor with the scraper.
Removing Vinyl Tiles
To remove vinyl tiles, use a utility knife to cut along the grout lines between the tiles. Then, use a pry bar to gently lift the tiles up and out. If the tiles are stuck to the subfloor, use a floor scraper to remove the adhesive.
Dealing with Adhesive
Once the vinyl flooring is removed, you may be left with adhesive residue on the subfloor. To remove the adhesive, you can use a commercial adhesive remover or a solution of hot water and vinegar. Apply the adhesive remover or solution to the subfloor and let it sit for a few minutes before scraping it off with a floor scraper.
Cleaning the Subfloor
After the adhesive has been removed, clean the subfloor thoroughly with a vacuum cleaner and a damp mop. This will ensure a clean surface for your new flooring.
Additional Tips
* Wear a dust mask and safety glasses during the removal process to protect yourself from dust and debris. * Use a hammer to tap the pry bar gently to avoid damaging the subfloor. * If you encounter any stubborn areas, use a heat gun to soften the adhesive before scraping. * Be patient and thorough during the removal process to prevent any damage to the subfloor.
How To Remove Vinyl Flooring Twenty Oak

How To Remove Vinyl Flooring The Home

What You Should Know About Removing Old Linoleum Or Vinyl Flooring Hq Longwood Fl

How To Remove Vinyl Flooring Removing Window Cleaning Tips

How Much Does Vinyl Floor Removal Cost In 2024 Checkatrade

How To Remove Vinyl Flooring Home Pros

How To Remove Vinyl Or Linoleum Flooring Jonny Diy

How To Remove Vinyl Flooring

Tips For Vinyl Floor Removal Caesarstone Tomdixon

Vinyl Removal All Stripped
See Also
