Removing Vinyl Flooring for a New Look: A Comprehensive Guide
Vinyl flooring has gained popularity for its durability and affordability. However, as time passes, you may decide to upgrade to a different flooring option for aesthetic or functional reasons. Removing vinyl flooring is a task that can be accomplished DIY or by a professional. Here's a comprehensive guide to help you through the process.
Safety First
Before starting, ensure your safety by wearing gloves, safety glasses, and a dust mask. Vinyl flooring may contain hazardous materials such as asbestos, especially if it was installed before 1989. If you suspect the presence of asbestos, it's crucial to contact a professional.
Assessing the Situation
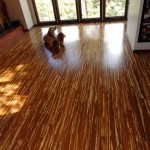
Start by determining the type of vinyl flooring you have. Sheet vinyl, vinyl tiles, and luxury vinyl planks (LVP) require different removal methods. Sheet vinyl is usually glued to the subfloor, while tiles and planks are often held in place by interlocking systems or adhesives.
Materials and Tools
For removing vinyl flooring, you'll need the following tools and materials: Plastic scraper, putty knife, crowbar or pry bar, heat gun or hair dryer, floor stripper, wide broom or dustpan, and a vacuum cleaner.
Step-by-Step Removal Guide
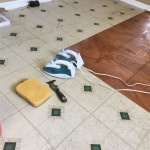
Sheet Vinyl- Use a heat gun or hair dryer to soften the adhesive.
- Insert the plastic scraper under the sheet and gently pry it up.
- Divide the sheet into smaller sections for easier removal.
- Remove the adhesive residue using a floor stripper.
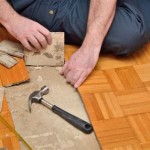
- Start at a corner or loose tile.
- Use a pry bar to gently lift a tile.
- Once the tile is loose, use a putty knife to remove the remaining adhesive.
- Continue removing tiles until the floor is clear.
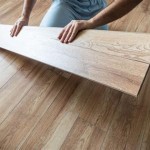
- Identify the starting point, usually on the edge of the room.
- Use a crowbar or pry bar to lift the plank at a 45-degree angle.
- Interlocking planks should come apart easily.
- Remove the planks and clean the subfloor of any adhesive residue.
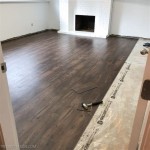
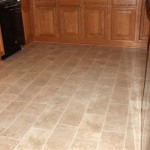
Floor Preparation
Once the vinyl flooring is removed, it's crucial to prepare the subfloor for the new flooring. Remove any remaining adhesive, dirt, or debris. If the subfloor is uneven or damaged, it may need to be leveled or repaired.
Disposal
Vinyl flooring is typically not recyclable. Dispose of it properly in your local waste disposal system. Check with your municipality for specific regulations regarding vinyl flooring disposal.
Conclusion
Removing vinyl flooring can be a manageable task if you have the right tools and knowledge. By following these steps carefully and taking safety precautions, you can prepare your subfloor for a new flooring installation that will enhance the look and feel of your home.

How To Remove Vinyl Flooring The Home

How To Remove Vinyl Floor Stains Easily

Removing Vinyl Flooring Homeadvisor

How To Remove L And Stick Floor Tile A Erfly House

The Truth About Asbestos Vinyl Flooring Chemcare

What Is The Cost To Remove Carpet And Install Laminate Flooring

How To Remove Linoleum Discount Dumpster Al

10 Beginner Mistakes Installing Vinyl Plank Flooring Fixthisbuildthat

Should You Install Vinyl Floor Over Tile

How To Prepare A Concrete Floor For Vinyl Flooring Parrys
See Also