Roll Out Vinyl Flooring: An Easy DIY Project
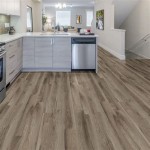
Transform your floors with a cost-effective and easy-to-install DIY project: roll out vinyl flooring. This versatile flooring option offers an array of benefits, from durability to style. With careful planning and a bit of elbow grease, you can create a stunning new look for your home.
Planning Your Project
Before you roll out the vinyl, take these steps to ensure a successful installation:
- Measure the area: Calculate the square footage of the room you're flooring, including any nooks or alcoves.
- Choose the right underlayment: Underlayment provides cushioning and helps even out the subfloor.
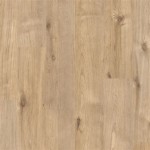
- Purchase the vinyl flooring: Determine the style, color, and quantity of vinyl you need. Consider the traffic level and desired durability.
- Gather your tools: You'll need a utility knife, measuring tape, level, straight edge, and adhesive. Some types of vinyl may require additional tools.
Step-by-Step Installation
Once you have everything you need, follow these steps to install your roll out vinyl flooring:
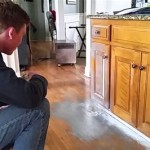
- Prepare the subfloor: Clean the subfloor thoroughly and remove any debris. Ensure it is level and smooth.
- Install the underlayment: Roll out the underlayment and secure it with tape or adhesive.
- Unroll the vinyl: Unroll the vinyl flooring and cut it to fit the room. Allow it to acclimate for a few hours before installing.
- Apply the adhesive: Spread the adhesive evenly over the subfloor, following the manufacturer's instructions.
- Lay the vinyl: Carefully lay the vinyl onto the adhesive, starting from the center and working outwards. Use a straight edge to ensure straight cuts.
- Trim the edges: Use a utility knife to trim any excess vinyl around the edges of the room.
- Seal the edges: Apply caulk or sealant around the edges of the flooring to prevent water damage.
Additional Tips
- Work in a well-ventilated area.
- Use a heavy roller to smooth the vinyl and remove any air bubbles.
- Allow the flooring to cure for the recommended time before walking on it.
- Clean the flooring regularly using a damp mop.
- Use area rugs or mats to protect the flooring from heavy furniture or foot traffic.
Conclusion
Installing roll out vinyl flooring is a rewarding project that can give your home a fresh, stylish look. With a little preparation and attention to detail, you can create a floor that is both durable and beautiful. Enjoy the satisfaction of a successful DIY project and the transformed space it brings.

Easiest 5 Diy Flooring Solutions Learn To Install On Your Own Inc

Tips For Diy Flooring Projects Everything You Need To Know

Easiest 5 Diy Flooring Solutions Learn To Install On Your Own Inc

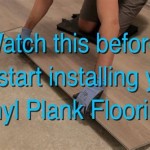
How To Lay A Vinyl Plank Floor Easy Diy Project For Beginners

Flooring Ideas Update Your Floors On A Budget

Pin On Easy Diy Projects

How To Install Sheet Vinyl Floor Decor Adventures

Installing Vinyl Plank Flooring For Beginners Anika S Diy Life

How To Install Vinyl Plank Flooring In A Bathroom Fixthisbuildthat

How To Install Floating Vinyl Flooring Over Old Floors Simply2moms
See Also