Roll-Out Vinyl Flooring: A Comprehensive Guide for DIY Beginners
Transforming the look of your home can be an exciting endeavor, especially when you embark on DIY projects that add both beauty and practicality. Roll-out vinyl flooring is an excellent choice for those seeking a durable, easy-to-install flooring option that mimics the appearance of natural materials like wood or tile. This guide will provide you with all the essential information you need to successfully complete a roll-out vinyl flooring installation, empowering you to create a stunning new space.
Benefits of Roll-Out Vinyl Flooring:
- Durability: Vinyl flooring is highly resilient and resistant to scratches, dents, and moisture damage, making it ideal for high-traffic areas.
- Ease of Installation: Unlike traditional flooring options, roll-out vinyl flooring can be installed without the need for adhesives or professional assistance, allowing for a quick and convenient transformation.
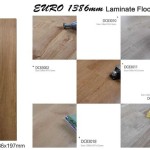
- Versatility: Vinyl flooring comes in a wide array of colors, patterns, and textures, providing endless design possibilities to complement any décor style.
- Water Resistance: Vinyl flooring is 100% waterproof, making it an excellent choice for bathrooms, kitchens, and other moisture-prone areas.
- Cost-Effective: Compared to other flooring materials, roll-out vinyl flooring offers an economical solution without compromising on quality or style.
Essential Tools and Materials:
- Roll-out vinyl flooring
- Utility knife
- Straightedge or ruler
- Measuring tape
- Caulk gun
- Caulking
- Tapping block or rubber mallet
Step-by-Step Installation Instructions:
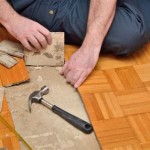
- Measure and Prepare the Subfloor: Measure the area where the flooring will be installed and ensure the subfloor is clean, level, and dry. Remove any existing flooring, baseboards, or obstacles.
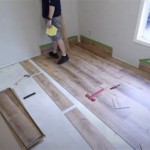
- Roll Out the Vinyl Flooring: Unroll the vinyl flooring and let it acclimate to the room temperature for at least 24 hours. Cut the flooring to fit the room, leaving a 1-inch gap around the perimeter.
- Adhere the Vinyl Flooring: Apply a thin bead of adhesive to the edges of the flooring and firmly press it into place. Use a tapping block or rubber mallet to ensure it is securely adhered.
- Trim the Excess: Use a utility knife and a straightedge to trim any excess flooring around the edges of the room.
- Caulk the Seams: Fill any gaps between the flooring and the walls or baseboards with caulk. Smooth it out with your finger or a caulk tool.
- Reinstall Baseboards: Reinstall the baseboards around the perimeter of the room to conceal the cut edges of the flooring.
Maintenance Tips:
- Sweep or vacuum the flooring regularly to remove dust and debris.
- Mop the flooring with a damp mop and a mild cleaning solution.
- Avoid using harsh chemicals or abrasive cleaners on the flooring.
- Protect the flooring from furniture legs and sharp objects by placing mats or coasters underneath.
By following these comprehensive instructions, you can confidently embark on a roll-out vinyl flooring installation project and transform your living space into a stunning and durable haven. Embrace the satisfaction of completing a DIY project that enhances both the aesthetics and functionality of your home.

How To Lay Sheet Vinyl Flooring

How To Lay A Vinyl Plank Floor Easy Diy Project For Beginners

Installing Vinyl Plank Flooring For Beginners Anika S Diy Life

How To Install Sheet Vinyl Floor Decor Adventures

How To Lay A Vinyl Plank Floor Easy Diy Project For Beginners

Installing Vinyl Plank Flooring For Beginners Anika S Diy Life

Flooring Ideas Update Your Floors On A Budget

A Beginner S Guide To Installing Vinyl Plank Flooring Dumpsters Com

Lvp Flooring Installation How To Install Luxury Vinyl Plank In A Basement Diy

Beginner S Guide How To Install Vinyl Plank Flooring Anika Diy Life
See Also