The Definitive Guide to Removing Laminate Flooring
Laminate flooring is a popular choice for many homeowners due to its durability, affordability, and ease of installation. However, when it comes time to replace or remove laminate flooring, it can seem like a daunting task. Not to worry! This definitive guide will walk you through the essential aspects of removing laminate flooring, making the process as smooth and effortless as possible.
Preparation is Key
Before you begin removing the laminate flooring, it's essential to take the necessary precautions to protect your surroundings. Remove all furniture and belongings from the room, and cover any remaining surfaces (e.g., baseboards, cabinets) with drop cloths or plastic sheeting. Ensure adequate ventilation by opening windows or setting up fans since the removal process can generate dust.
Gather the Right Tools
The success of your laminate flooring removal project heavily relies on having the appropriate tools. These typically include:
- Pry bar
- Hammer or mallet
- Utility knife
- Safety glasses
- Work gloves
- (Optional) Laminate flooring removal tool
Understanding Laminate Flooring Construction
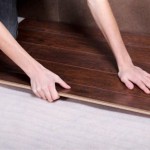
Laminate flooring consists of multiple layers, including a decorative top layer, a core layer, and a backing layer. The planks are typically connected using a tongue-and-groove locking system. Understanding this construction is crucial for effective removal.
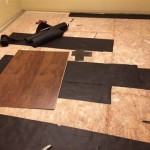
Step-by-Step Removal Process
Now, let's delve into the step-by-step removal process:
Step 1: Locate the Starting PointIdentify the last plank installed (usually near a wall or doorway) and carefully remove the baseboard or quarter-round molding.
Step 2: Pry Up the First PlankUsing a pry bar, gently pry up the edge of the first plank at an angle of 15-20 degrees. Avoid applying excessive force to prevent damage.
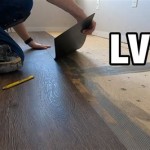
Step 3: Remove Subsequent PlanksOnce the first plank is loose, insert the pry bar into the gap created and pry up the adjacent plank. Continue removing the planks one by one, working towards the opposite wall of the room.
Step 4: Handle TransitionsWhen encountering transitions (e.g., to carpet or tile), carefully cut the laminate flooring along the transition using a utility knife. Remove the cut piece and proceed with removing the remaining planks.
Step 5: Remove Remaining PlanksAs you approach the end of the room, remove any remaining planks by prying them up from the opposite side of the room.
Disposing of Removed Flooring
Once all the laminate flooring is removed, it's time to dispose of it properly. Check with your local waste management company for specific guidelines. Laminate flooring can often be recycled or disposed of in landfills.
Conclusion
Removing laminate flooring can be a manageable task with the right preparation, tools, and techniques. By following the steps outlined in this definitive guide, you can effectively remove your laminate flooring, leaving a clean and prepared surface for your new flooring installation.

How To Remove Laminate Flooring Bob Vila

A Comprehensive Guide To Removing Floors Discount Dumpster

How To Remove Laminate Flooring The Home

How To Remove Laminate Flooring Discount Dumpster

How To Easily Replace A Damaged Laminate Floor Plank Interior Design Wonderhowto

Deep Cleaning Your Laminate Floors A Step By Guide

How To Remove Hardwood Flooring For Reuse

Laminate Flooring Types And S Forbes Home

6 Steps For Installing Laminate Flooring The Home

Tips For Diy Flooring Projects Everything You Need To Know
See Also