Essential Aspects of Vinyl Flooring Removal Tips
Vinyl flooring is a popular choice for many homes due to its durability, affordability, and ease of maintenance. However, when it comes time to replace or remove vinyl flooring, it can be a daunting task. Here are some essential aspects to consider when removing vinyl flooring:
1. Determine the Type of Vinyl Flooring
The first step is to determine the type of vinyl flooring you have. There are two main types: sheet vinyl and vinyl tiles. Sheet vinyl is a single piece of material that is rolled out and glued down to the subfloor. Vinyl tiles are individual tiles that are glued or snapped together.
2. Gather the Necessary Tools
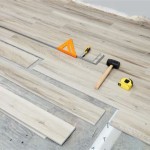
Once you know the type of vinyl flooring you have, you can gather the necessary tools. For sheet vinyl, you will need a utility knife, a pry bar, and a heat gun. For vinyl tiles, you will need a putty knife, a pry bar, and a hammer or mallet.
3. Prepare the Area
Before you start removing the vinyl flooring, you need to prepare the area. This includes clearing away any furniture or appliances, and protecting the walls and baseboards with masking tape. You should also turn off the power to the room.
4. Remove the Baseboards
If the baseboards are covering the edges of the vinyl flooring, you will need to remove them. This can be done with a pry bar or a hammer and chisel.
5. Score the Vinyl Flooring
For sheet vinyl, you will need to score the material along the edges and in the center. This will make it easier to remove. You can use a utility knife to score the vinyl.
6. Heat the Vinyl Flooring
For sheet vinyl, you will need to heat the material with a heat gun. This will soften the adhesive and make it easier to remove. Be careful not to overheat the vinyl, as this can damage it.
7. Pry Up the Vinyl Flooring
Once the vinyl flooring is scored and heated, you can start to pry it up. Use a pry bar to gently lift the vinyl flooring from the subfloor. Be careful not to damage the subfloor.
8. Remove the Adhesive
Once the vinyl flooring is removed, you will need to remove the adhesive from the subfloor. This can be done with a putty knife or a chemical adhesive remover. Be sure to follow the manufacturer's instructions on the adhesive remover.
9. Clean the Subfloor
Once the adhesive is removed, you will need to clean the subfloor. This can be done with a broom and dustpan, or a vacuum cleaner. Make sure the subfloor is clean and dry before installing new flooring.
Removing vinyl flooring can be a challenging task, but it is possible to do it yourself with the right tools and techniques. By following these tips, you can safely and effectively remove vinyl flooring from your home.

How To Remove Vinyl Flooring The Home

How To Remove Old Vinyl Flooring

How To Remove Vinyl Flooring The Home

How To Remove Vinyl Flooring Twenty Oak

Tips How To Clean Vinyl Flooring 4 Easy Steps Expert Advice

How To Remove Vinyl Flooring Removing Window Cleaning Tips

How To Remove Vinyl Flooring

51 Diy Demolition Tips You Need To Know Vinyl Flooring Removing Kitchen

How To Clean Vinyl Floors Easily Secret Tip The Graphics Fairy

How To Remove Vinyl Floor Stains Easily
See Also


