Installing Cork Flooring: A Comprehensive Step-by-Step Guide
Cork flooring, a natural and renewable resource, has gained popularity due to its durability, sound absorption, and insulation properties. Installing cork flooring may seem daunting, but with proper preparation and attention to detail, it's a manageable task.
Step 1: Prepare the Subfloor
Ensure the subfloor is flat, level, and free of moisture. Remove any existing flooring or carpet. Level out any uneven surfaces using a self-leveling compound or plywood underlayment. Check for moisture using a moisture meter to confirm it's within acceptable levels (less than 12%).
Step 2: Acclimate the Flooring
Before installing, allow the cork flooring to acclimate to the room's temperature and humidity for 48 to 72 hours. This helps minimize expansion or contraction after installation.
Step 3: Lay Out the Cork Flooring
Plan the layout of the flooring in advance to minimize waste. Start by laying out the first row of planks, leaving a 1/4-inch expansion gap around the perimeter. Use a tapping block and hammer to gently tap the planks into place.
Step 4: Join the Planks
Most cork flooring has a tongue-and-groove joint system. Align the tongue of one plank with the groove of the adjacent plank and gently slide them together. Use a rubber mallet to tap the planks into place, ensuring a tight fit.
Step 5: Cut and Fit Boards
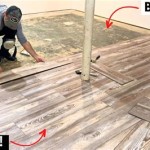
For areas around corners, pillars, or walls, you may need to cut the cork planks to fit. Use a sharp utility knife or circular saw with a fine-tooth blade. Measure carefully and make precise cuts to ensure a seamless transition.
Step 6: Seal the Flooring
Once the flooring is installed, seal it to protect it from wear and moisture. Use a polyurethane-based sealant, applying at least two coats. Allow each coat to dry thoroughly before applying the next. Use a brush or foam applicator for even coverage.
Step 7: Install Transition Strips and Moldings
Transition strips cover the gap between different flooring types or at doorways. Moldings provide a finished look around the perimeter of the room. Secure them using nails or screws and caulk any gaps.
Additional Tips
* Wear knee pads and safety glasses during installation. * Use a level to ensure the flooring is flat. * Stagger the joints of the planks for added strength. * Leave a small gap between the planks and walls to allow for expansion. * Avoid installing cork flooring in areas with high moisture, such as bathrooms.
Complete Guide To Cork Flooring Installation Deerfoot Carpet

Complete Guide To Cork Flooring Installation Deerfoot Carpet

How To Install Cork Flooring

How To Install Cork Floor Forna Floating Flooring Icork

How To Install A Floating Cork Floor Young House Love

Installing Cork Flooring Tiles Guide Must Read Icork Floor

Diy Cork Flooring Installation

Cortejo Luxury Cork Flooring Installation Guide

How To Install Cork Floor Forna Floating Flooring Icork

Diy Cork Flooring Pros Cons Green Installation Guide For Leed Passive House Ecohome
See Also
