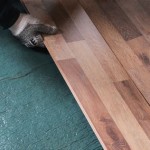
Mastering the Art of Wood Filler for Hardwood Flooring
Hardwood flooring, a classic and elegant choice for homes, can develop minor imperfections or gaps over time. Wood filler, a versatile material, offers a simple and effective solution to restore the floor's pristine appearance. By understanding the essential aspects of using wood filler for hardwood flooring, homeowners can achieve professional-looking repairs that blend seamlessly with the existing wood.
Choosing the Right Wood Filler
Selecting the appropriate wood filler is crucial for optimal results. Look for products specifically designed for hardwood flooring repairs. These fillers typically contain fine sawdust or wood fibers that match the color and grain of common hardwood species. Consider the extent of the repair; for deep gaps or holes, a two-part epoxy filler may provide superior adhesion and strength.
Preparing the Hardwood Floor
Before applying wood filler, prepare the hardwood floor surface by thoroughly cleaning it with a damp cloth to remove any debris or dirt. Sand any rough edges around the gap or hole using fine-grit sandpaper. Ensure the area is dry before proceeding.
Applying Wood Filler
Using a putty knife or a small spatula, spread the wood filler evenly into the gap or hole. Overfill the area slightly, as the filler will shrink as it dries. Press down firmly to ensure good contact with the hardwood floor.
Removing Excess Filler
Once the filler has dried slightly, use the putty knife or a razor blade to scrape away any excess. Hold the blade parallel to the floor and carefully remove the excess filler, taking care not to scratch the surrounding wood. If the filler is still soft, moisten the blade with rubbing alcohol or water for easier removal.
Finishing the Repair
After the filler has completely dried, you may choose to further enhance the repair by staining it to match the surrounding hardwood floor. Select a stain that closely resembles the color of the wood and apply it using a small brush. Allow the stain to dry thoroughly.
Tips for a Professional-Looking Repair
- Practice applying the filler on an inconspicuous area of the floor to ensure a proper match.
- If the gap is particularly deep, fill it in layers, allowing each layer to dry before applying the next.
- Avoid using excessive moisture during cleanup, as it can weaken the bond between the filler and the hardwood.
- For larger repairs or major damage, it may be advisable to consult a professional flooring contractor.
Conclusion
Mastering the art of wood filler for hardwood flooring empowers homeowners to restore the beauty and integrity of their floors. By carefully selecting the right filler, preparing the surface, applying it with precision, and finishing the repair with attention to detail, you can achieve professional-looking results that will blend seamlessly with the existing hardwood.

Comprehensive Guide To Engineered Wood Floor Repair Sanding

What Is The Best Way To Draught Proof Stripped Wooden Floors Environment Guardian

What Is The Best Way To Draught Proof Stripped Wooden Floors Environment Guardian

How To Use Interior And Exterior Wood Filler Finishes Direct

How To Prepare Hardwood Floors For Drum Sanding

How To Fill Nail Holes In Wood Before Staining 9 Easy Steps

115 Y O Hardwood Floor Seriously Beaten How To Fill Gaps And Paint

Hardwood Floor Repair How To Replace Boards Practical Whimsy Designs

At Last Refinished Hardwood Floors Centsational Style

Comprehensive Guide To Refinishing Parquet Flooring Re Your Floors Today
See Also
